
Following up on the previous post, I’d like to organize Docker commands and usage methods =)
Installing Docker#
First, we need to install Docker to use it, right?
In my case, I installed Docker in an Ubuntu environment using an AWS EC2 instance.
If you need installation instructions for Ubuntu or other environments, please refer to the official documentation below!
Install Docker Engine on Ubuntu - docs.docker.com
Removing Old Docker Versions and Installing New Version#
If you want to remove the old version of Docker and install the new version, use the following commands to remove the old version.
For Ubuntu
sudo apt-get remove docker docker-engine docker.io containerd runc
Update repository
sudo apt-get update
Install packages to allow apt to use repository over https
sudo apt-get install apt-transport-https ca-certificates curl gnupg-agent software-properties-common
Add Docker’s official GPG key to apt
curl -fsSL https://download.docker.com/linux/ubuntu/gpg | sudo apt-key add -
Add Docker repository
sudo add-apt-repository "deb [arch=amd64] https://download.docker.com/linux/ubuntu $(lsb_release -cs) stable"
Update apt to reflect the changes
sudo apt-get update
Install Docker
sudo apt-get install docker-ce docker-ce-cli containerd.io docker-compose-plugin
After completing the Docker installation with the above commands, we need to verify it!

sudo docker version
or
sudo docker run hello-world
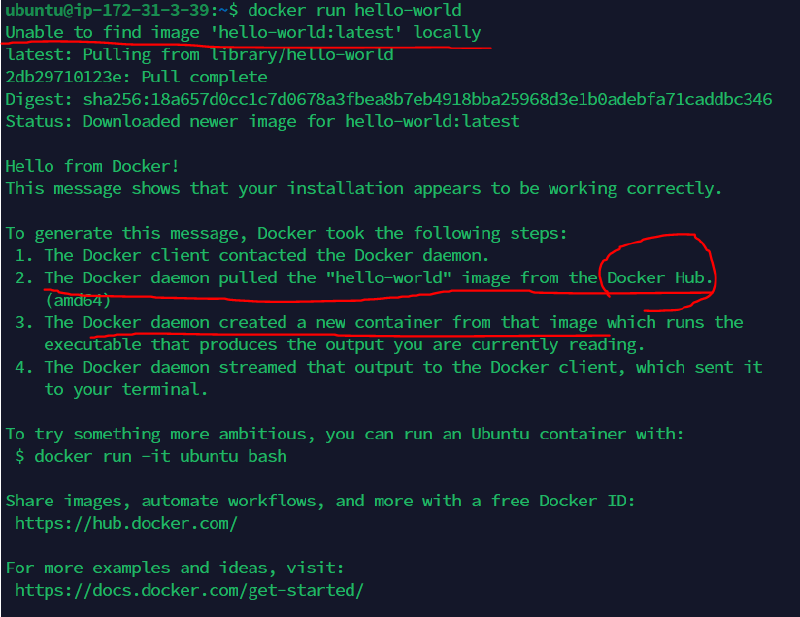

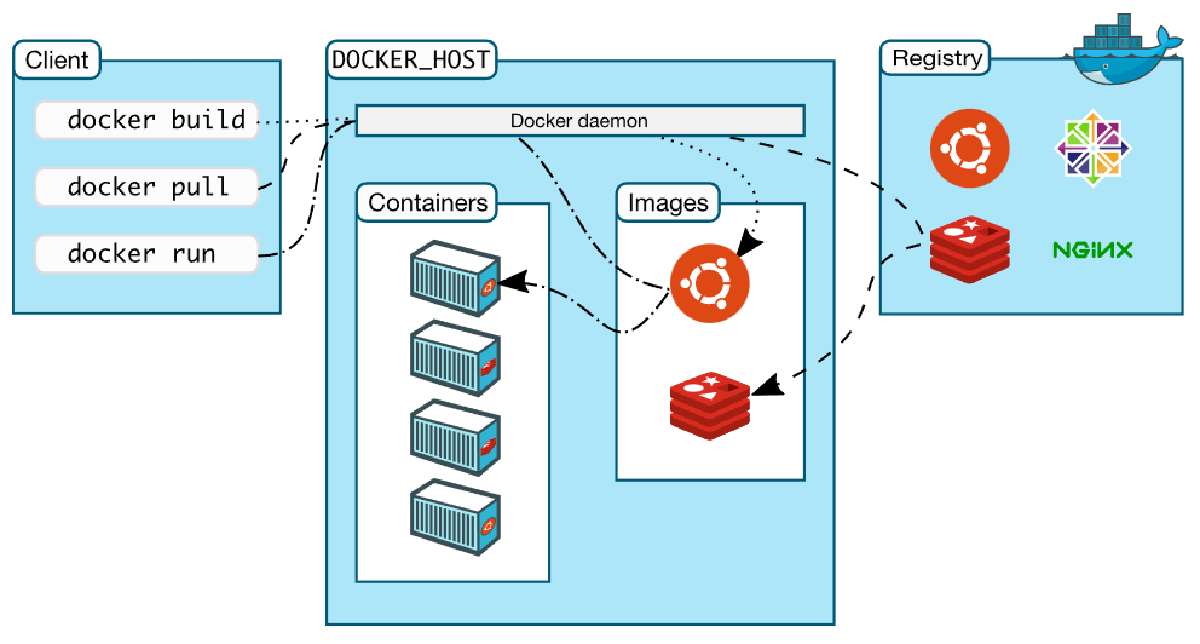
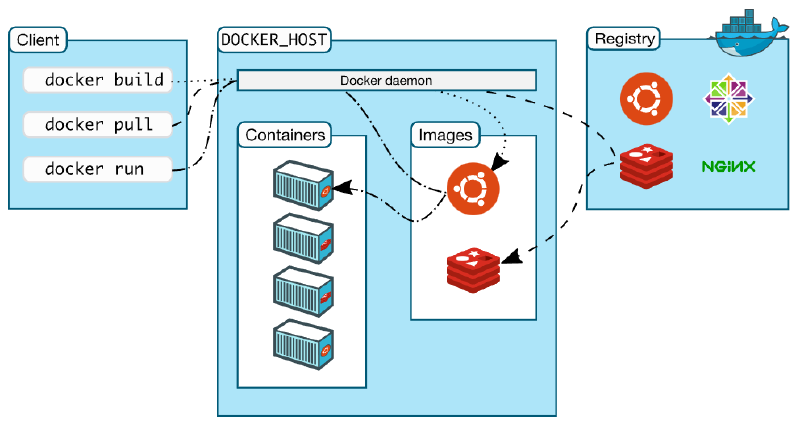
When you use the run command as above, it will search for the hello-world image locally, and if it doesn’t exist, it will download the image from Docker Hub and run it as a container =)
Docker Permission Settings#
If you see the following message when executing Docker commands, don’t worry haha
This message appears because users other than root don’t have permission to use Docker =)

First, check Docker permissions.
cat /etc/group | grep docker

In my case, I’ve already added user permissions, so you can see the username “ubuntu” added at the end.
If it’s not added, you’ll see something like docker:x:999:!
Add your user ID to the Docker group
sudo usermod -aG docker [username]

For the username, as shown in the example above, I used “ubuntu” as my username.
For Linux, the default username is typically set to ec2-user =)
Reboot the system.
sudo reboot
Now let’s check the version again without sudo before the docker command.
docker version


If you see both Client and Server information as shown above, the permissions have been successfully granted. =)
If you still see the Got permission denied ... message, the permission settings were not properly configured, so please check again and search for any additional error messages!
If you share error messages in the comments, I’ll help you troubleshoot them too haha
Windows & Mac OS Docker Desktop#
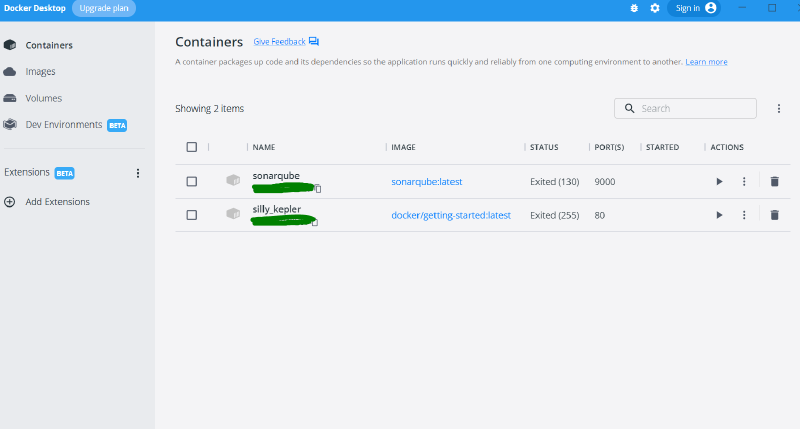
+ Additionally, Windows and Mac OS support Docker Desktop, which provides an easy installation with a GUI!
Please note that it’s only free for individual users, companies with fewer than 250 employees, or companies with less than $10 million in revenue!
For installation instructions, please refer to the official documentation links below =)
Install Docker Desktop on Windows - docs.docker.com
Install Docker Desktop on Mac - docs.docker.com
Docker Commands#
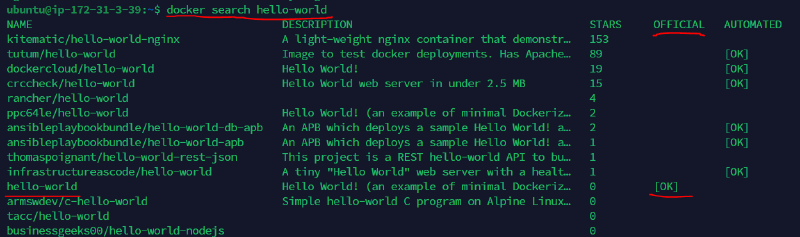
Docker Image Search#
Search for images in Docker Hub, Docker’s official registry.
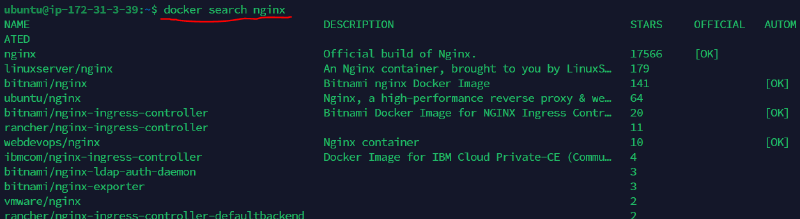
sudo docker search [Image name to search]
Download Image#

sudo docker pull [image name]:[tag]
Generally, if you don’t specify a tag name when creating an image, the default value “latest” is attached =)
Push Image to Docker Hub Account#
In my case, I’ll push the hello-world image I just downloaded to my docker-hub account.
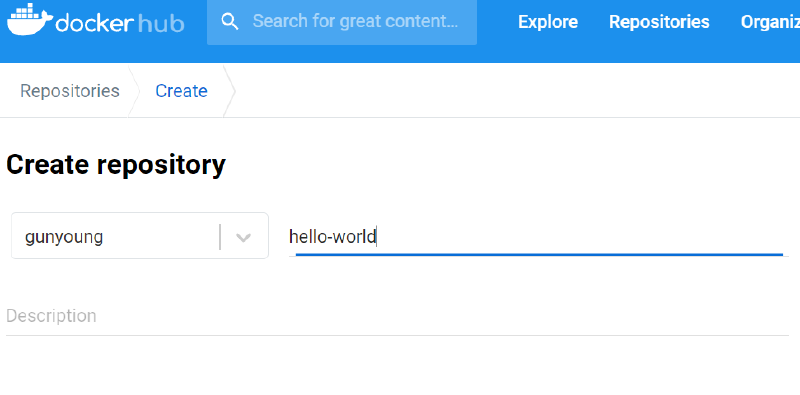
Before pushing, let’s create a repository called hello-world on docker-hub.
sudo docker push [docker-hub ID]/[image name]:[tag]

Hmm… the image push failed with the following message. =(
The reason is that the repository name on Docker Hub and the local Docker image repository name must match.
Solution
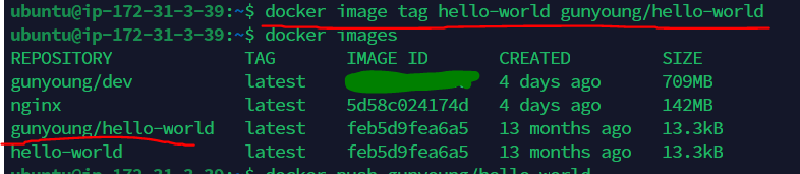
sudo docker image tag [image repo name]:[tag] [new image repo name]:[tag]
This method doesn’t rename the image but copies it and creates a new image with a new name. =)
In my case, I didn’t specify the tag part separately because the changed repo will also use the default “latest”.
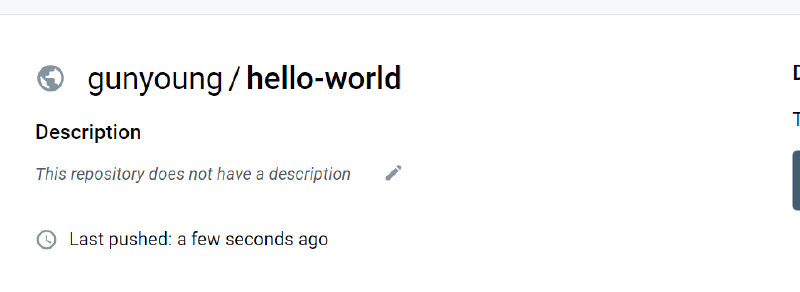
Let’s try pushing again haha.

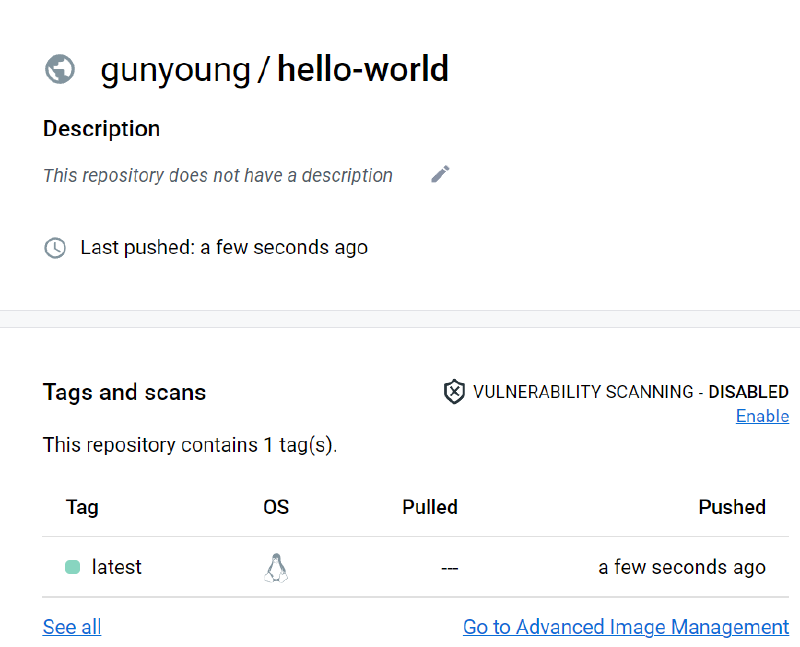
Now you can see that the image has been pushed successfully! =)
Check Downloaded Images#
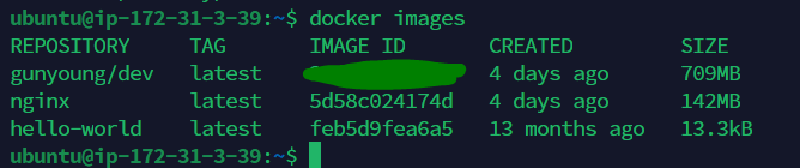
sudo docker images
Run Docker Image as Container#

docker run -d -i -t --name [container name] -p [host port:container port] [image name or ID]
In my case, I already have a Spring Boot project built as a Docker image, so I’ll run that image as a container. =)
Generally, the -i and -t options are used together as -it =)
host port is the external port that users will access after the container is launched, and container port is the port specified when building the Docker image using a Dockerfile. =)
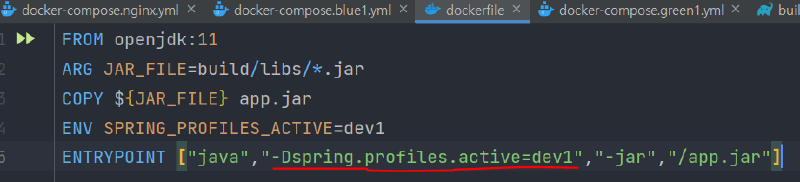
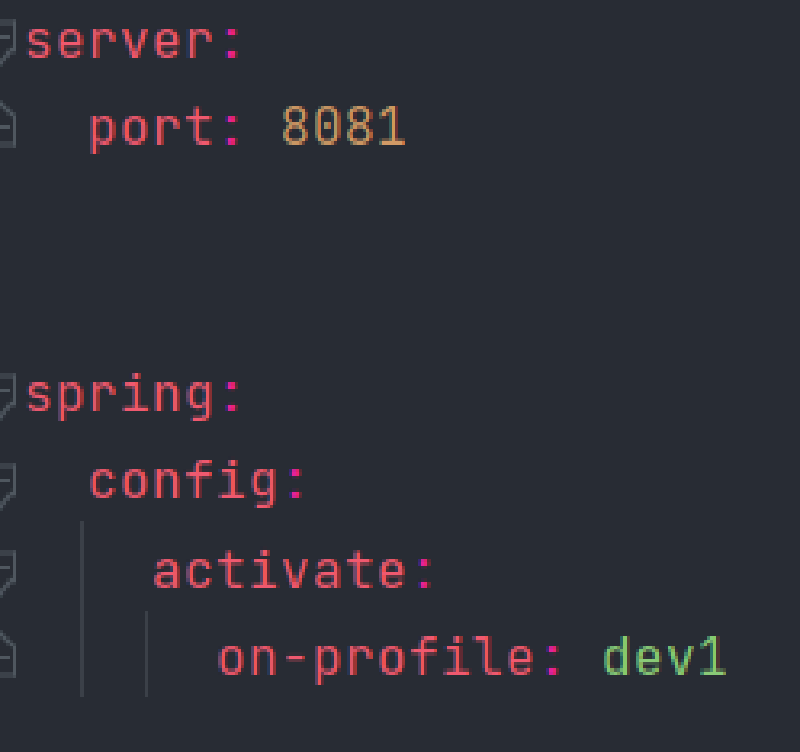
In my case, when creating the image, I specified the dev environment among the local, dev, and prod environments in the .yml file, and the server port for that dev environment was set to 8081, so I specified the containerport as 8081!
For image name or ID, you can enter the name of the image to run or its ID value. =)

Various Docker options are organized below, so please refer to them!
Now that we’ve run the image, we need to check if the container is running properly, right?
Check Running Containers#

sudo docker ps
After the container is running, when I access http://[public ip]:8080, I can confirm that the server is running well! =)
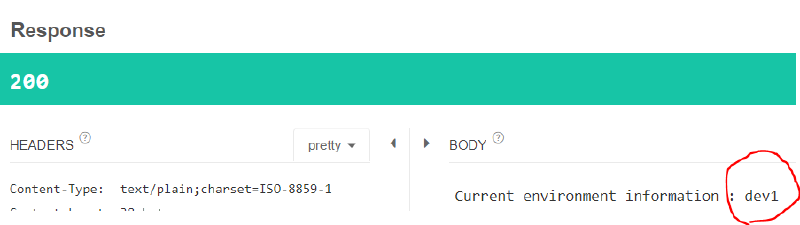
I was also able to confirm through the API I created that the operating environment of the currently running server is the dev1 environment specified in the dockerfile. =)
Port Mapping Experiment#
Let me do one more experiment here. As I mentioned earlier, I specified dev1 as the operating environment in the Docker file, and the image built through that dockerfile internally has a server port of 8081.
So what happens if I run this image with -p 8080:8080, setting the container port to 8080 instead of 8081??


First, the container launched successfully!
Now let’s try accessing the server’s IP and external access port 8080!

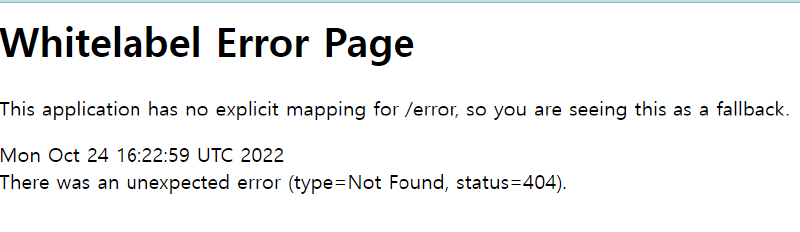
This time, the container launched successfully, but the server doesn’t seem to be working properly =)
This confirms that the operating environment settings specified in the dockerfile are working correctly!
Basic Docker Commands#
$ sudo docker pull [image name to download]:[tag]
$ sudo docker push [docker-hub ID]/[image name]:[tag]
$ docker images
# View images that exist locally, downloaded via pull or run
$ docker run -d -i -t --name [container name] -p [host port:container port] [image name or ID]
# Run Docker image as a container. For official images on Docker Hub,
# it will automatically download and run them if they don't exist locally.
$ sudo docker ps
# Show running containers that are launched from images
$ sudo docker ps -a
# Show all containers including stopped ones, in addition to running containers
$ sudo docker stop [container name or container ID]
# Stop currently running container
$ sudo docker start [container name or container ID]
# Start a stopped container
$ sudo docker restart [container name or container ID]
# Restart a running container
$ sudo docker rm [container name or container ID]
# Delete a container
# To delete a container, you must first stop the container =)
# +tip: When entering container ID, you only need to type 2-3 characters
$ sudo docker rmi [image name or image ID]
# Delete an image
# Similarly, when using ID to delete, you only need to enter 2-3 characters =)
$ sudo docker logs [container name or container ID]
# View logs of the running container
$ sudo docker exec -it [container ID] /bin/bash
# Access container internally
# To exit: $ exit
Docker Command Options#
Let’s take a look at Docker command options!
-i : --interactive : Activates standard input and keeps standard input open even when not attached to the container. Use this option to enter Bash commands.
-t : --tty : Use TTY(pseudo-TTY). This option must be set to use Bash; without it, you can enter commands but the shell won’t be displayed.
-d : --detach : Detached mode, also called daemon mode. The container runs in the background.
-p : --publish : Connect host and container ports. (Port forwarding) ex) -p 80:80
–privileged : Use all Linux kernel capabilities (Capability) of the host inside the container. This allows access to the host’s main resources.
–rm : Automatically remove container when process terminates
–restart : Set restart policy when container terminates.
-v : --volume : Data volume setting that connects host and container directories, so changes made on the host are applied identically inside the container. Concept of synchronization.
-u : --user : Set the Linux user account name or UID under which the container will run. ex) --user ubuntu
-e : --env : Set environment variables to use inside the container. Generally used to pass configuration values or passwords.
–link : Connect containers. [container name:alias] ex) --link "mysql:mysql"
-h : --hostname : Set the hostname of the container.
-w : --workdir : Set the directory where the process inside the container will run.
-a : --attach : Connect standard input (stdin), standard output (stdout), and standard error (stderr) to the container.
-c : --cpu-shares : CPU resource allocation setting. Default is 1024, and each value is applied relatively.
-m : --memory : Set memory limit. ex) --memory="100m"
–gpus : Configure the container to use the host’s NVIDIA GPU. To use this method, the host must have: NVIDIA GPU-equipped Linux server + NVIDIA driver installed + Docker version 19.03.5 or higher
--gpus all: Use all GPUs--gpus "device=0.1": Use specified GPU
–security-opt : Configure SELinux and AppArmor options. ex) --security-opt="label:level:TopSecret"
